31 January 2012

Canon in hospital

After the sad demise of my Canon 300D (see here) whilst practising with my new time-lapse gizmo I was looking around for another camera. Eeeekkk too pricey so I decided not to give up hope on the 300D. I took it today to the nearest thing I know to a hospital for sick cameras. Knowing exactly what the problem was - the auto focus mirror is not rising up out of the way when the image is captured because the tiny plastic pin has broken or fallen out - means diagnosis is easy and a solution quick to find.

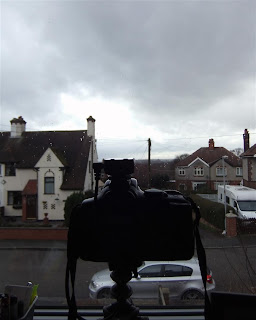
Not sure if you can see what is going on in here -
but the auto focus mirror at the back is only coming up
about a quarter of the way - disaster


Solution 1 - Can find the pin that fell out (impossible)

Solution 2 - Get into the heart of the camera to fit a replacement (scarily drastic)

1 and 2 not really practical - seems like it is terminal for the poor thing. However - little ray of sunshine shone my way.

Solution 3 - If I don't want to use the auto focus function on the camera then all is not lost (and also open heart surgery will not be required). I can glue the auto focus mirror to the main mirror so when that swings up out of the way the auto focus mirror will be stuck to it and swing fully out of the way.

This may sound a little Heath Robinson and some would say auto focus has to be the best thing since sliced bread for jobbing photographers - but - I only want to use this camera for my time-lapse experiments. I will ALWAYS manually focus and make all settings manually before any captures so this seems like it will not be a huge hardship.

It is a lovely little camera and was my first introduction into DSLRs so I do not want to say goodbye to it - but if I can repair in a way that costs very little, doesn't damage the camera, means I can still use it for the thing I brought it out of retirement for - then I think I have a win, win, win, situation!

yeah hay

Special thanks go to Vinny, for his patience and advice.

. . . . . . . . . . . . . . . . . . . . . . . . . .

Photo Tips #6

Top tips for you and your camera

# 6 - PRINT YOUR PHOTOS
Here we are with our digital cameras busily snapping away, downloading the hundreds (or thousands) of images and uploading them to our Facebook or Flickr accounts or sharing them with family or friends via email. In the days of analogue, when we had to put a film into the back of our camera, we had to wait for our film to be processed and then collect the prints.

What seems to be missing in this digital age is something to hold in your hand, put into a frame or stick into a treasured family album.

Let's start printing some of our favourite images. You can do this yourself, if your printer is up to it, or find an online print monkey to sort them for you. Jessops, Snapfish, Boots, Photobox, Truprint all offer deals and offers for anything from 6"x4" prints to large canvasses. Now you just have to decide what to do with these lovely images:

*  Make a Wall of Achievement - Collect images from trips, epic weekends, and the time you met your favourite celebrity. Dedicate a wall in your home and adorn it with a framed display of all the cool things you've done so far in life. Mix and match frame styles for visual interest. Make your images into posters and postcards and stick them to the wall in amongst your framed images too. 


*  Make a Journal - If you want somewhere to keep a record of your ideas and memories think about making a journal. There are a number of tutorials online showing you how to turn your printed photographs into a journal that you can use for notes or doodles or inspiration.


*  Make an Album - Instead of having magazines, newspapers and remote controls on your coffee table - make a flick through photo album and leave it laying around the when your friends call round they can pick it up and start flicking through and start giggling at the memories.


*  Make a Calendar - obviously this tip comes a little late in the year - but perhaps it will give you inspiration to work on images through this year to create a calendar ready for 2013. There are tutorials to make your own calendars available online as well as a variety of printers who will take your images and turn them into and print your calendars for you. Check out Snapfish, Vista Print, Photobox, BigHugeLabs - there are many.


*  Make a Portfolio - If you love your images you will want to show them off at their best and be able to carry them around to show others. Think about creating a book (Blurb, Snapfish, Lulu, Jessops) full of your stunning images using their layout options to be creative. Or think about a traditional portfolio. Silverprint offer everything from clam boxes to leather bound A3 portfolios.
Celebration PhotoBook

Whatever you decided - set your images free - get them off the computer and out into the big wide world. What is better than having fun showing off your images and sharing your memories.

  
Next top tip - Landscapes - next week.

. . . . . . . . . . . . . . . . . . . . . . . . . . . . . . . .
29 January 2012

Happy

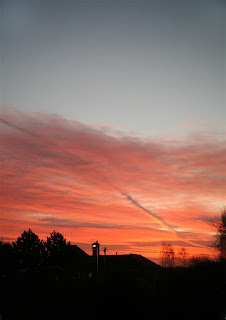
This image makes me happy:


. . . . . . . . . . . . . . . . . . . . . . . . . . . . . . . .
Diversify or Specialise

Equine

Had a lovely morning at Louella Stud with a networking friend, who has two mares there, marvelling at the gorgeous stallions. Reminded me just how much I love horses - and animals as a whole. Began thinking about my business offer and what I can specialise in - or areas I can diversify into.

Equine:
The stallions each have a stud cards which mention all their best features (one eyebrow raised) including the cost to have the stallion cover your mare (no foal, no fee). What caught my eye was the gorgeous photography. I picked up a business card and have been finding out more about Steve today.

I will be discussing this with my business mentor next week. Such fun.

. . . . . . . . . . . . . . . . . . . . . . . . . . . . . . . . . . . . . . .

28 January 2012

Setting sun

Practice is the only way to succeed. So practice I shall. Set up my new toy in the office window again to capture the setting sun. Got slightly distracted by a firework display taking place at Conkers and in the final frames you might be able to see the smoke from the fireworks drift across the sunset. 

There is sound on this video

Now that I am getting to grips with all the new gadgets I am beginning to get itchy fingers for trying out some new techniques.

. . . . . . . . . . . . . . . . . . . . . . . . . . . . . . . . . .

Pimped my time-lapse

I was very pleased and proud of the time-lapse PhotoFilm I created yesterday but felt it needed a little bit of fairy dust, and more importantly, a bit of music to help it along. I have spent the afternoon slightly reworking it and adding a part of Shpongle to it.

Enjoy:

This video has sound

I have been improving my skills on fading and making those look more pleasing to the eye. I am also finding my style with the title sequences. I used this piece of music as it was all I could find online that was free to download. However I have just discovered I have access, from this computer, to my whole iTunes library. And let me tell you that library is maaahhhuuuussive. I can safely say that each and every film I produce will now have a music track - at the very least. The plan of course is to do some interviews but for now I shall use music.

. . . . . . . . . . . . . . . . . . . . . . . . . . . . . .

27 January 2012

Time-lapse success

Well I'm no Kubrick - but boy am I learning lots from using my new toy and creating these PhotoFilms. The best way to learn is to make mistakes and I am doing that with gusto! As I begin to learn how the software works I am exploring and experimenting with other features. Confidence grows as techniques develop. But I do know I will be back to see Red Door Studios for some specialist guidance at some point soon.

After yesterday's breaking camera and spending 4.5 hours getting 550+ images into shape I have produced the following time-lapse experiment and presented it this morning at my weekly Network meeting. 


There is no sound on this video.

I have finally got to the bottom of how to convert the .mov files to .mp4 files so that I can get them onto my iPad and show them off - to anyone that will watch!

I find creating these so exciting along with learning new techniques. As my skills improve and my curiosity to find out what else I can do with the software increases my ideas on how and what to photograph/film/capture will improve.

Need to start capturing sound and incorporate that - I have many projects ideas that will benefit from a story being told.

The facts and figures:
552 images captured over 77 mins. An image captured every 10 seconds.
At 30 frames per second the 552 images were reduced to the 18 seconds you see.
. . . . . . . . . . . . . . . . . . . . . . . . . . . . . .

26 January 2012

Experimentation

Time-lapse experiment begins. Last night it all started but went a little wrong. The transmitter needed a new battery - I couldn't even get started.

Finally the Transmitter is working

I have now had chance to watch some of the online tutorials on how to use this baby. The best is here. I have programmed it successfully. No to get started with pointing my camera at something - the only place that is sturdy, that I can keep an eye on it and there is an activity is out of the office window. (Clouds slowly rolling over and occassional cars/people in the street - ooo and rain).

300D observing the world

These first set-ups will be about getting to grips with the settings and trouble shooting any problems - I do not intend to capture anything stunning or outstanding. I'm typing away and I can hear it clicking and capturing an image every 3 seconds. With something like clouds I think fast shutter speeds are fine but I think if I want to capture set-ups with many people moving about I will need to adjust the settings to get something the Americans call 'Drag'. This means a longer shutter speed so that you capture some motion blur on those things in your image that are moving. The results are much more pleasing and help give the piece some context.

The approaching storm

It's about to start raining and the drops are falling onto the window in front of the camera - that will look good (or annoying) on the finished piece - cant wait to find out!

The practical stuff:
I need to find out the maximum extent of three of the items in this set-up. How quickly will the memory card fill up? How long will the Transmitter battery last (it is working the whole time communicating with the camera). How long will the camera battery last?

I have been watching some other people's attempts at time-lapse photography on Vimeo - some of which are stunning. Some of the guys have set up their cameras on Dollys which move slightly at intervals as the shoot progresses. In the finished 'movie' this appears smooth and very interesting. I found it a bit disorientating and it brought on feelings of seasickness. But what stunning captures they achieved. I have a lot to aspire to and techniques to learn. 

Right let's see how the camera is doing and see if I can make a movie out of this rain cloud!

Think I may have found the endurance level of the Canon 300D - seems it has an issue with the mirror. Better get onto internet and find out how to fix it.


Hmm not something I can fix - it appears a plastic pin on the mirror has failed and needs creative intervention. I might know a man that can. Am now using the 5D. 


. . . . . . . . . . . . . . . . . . 

25 January 2012

New Toy

Interval Timer and Wireless Remote Control
Giga T Pro II

Hahnel Giga T Pro II

Oh yes - bought myself one of these little beauties to experiment some more with interval photography and to create time-lapse movies.

Tonight is the night to set it up and test everything to its maximum. I need to find out how long the battery in the camera will last and how many images can be stored on the cameras CF card. All of these things I need to know to be able to determine at what interval I set the gizmo to capture what I am after.

It's a bit like the equation where if you know two of three of these things then you can work out the other... Miles, Time, Speed. If you know how far you've gone and how long it took - then you can work out your speed. Similarly if you know how long it took and the speed you can work out the distance.

After this evening I will be able to work out so many things - how long I can set up the camera for, maximum number of images I can capture, the duration, the intervals - all of it.

I am mightily impressed with the potential of this - however first problem seems to be that the batteries pre-installed in the Transmitter have gone flat. Quick trip to the supermarket and problem resolved.

Update:
Battery was dead in the Transmitter and it is now working with a new battery safely installed. However trying to work out how to use it in the 10 minutes before I have to leave the house this evening is not conducive to getting this correct. Will leave it until the morning and try again then. I love getting to grips with new equipment.

. . . . . . . . . . . . . . . . . . . . . . .

23 January 2012

Photo Tips #5

Top tips for you and your camera

# 5 - SHOOTING STAR TRAILS

If you get as excited about the night sky as I do - then you will love this tip. If you watch the Stargazing show three nights last week you will have seen some quite spectactular star trail images. Well now you can try it for yourself.

There is so much to see in the night sky on a clear, cloudless night that I often cant resist getting my camera out and having a play. Astrophotography is an exciting area of photography and star trails are an easy introduction to this field.

You need your camera on a tripod (or a solid surface); your lens wide open (f22 or as high as it'll go); and have some way of being able to control how long an exposure you can capture with either a cable release or remote shutter release.

You can use a telephoto lens and try shorter exposure times, but a wide angle lens will give you more of the night sky in your capture - but you will need a longer exposure. Anything from 10 seconds to a few hours - depending on the effect you are after.

This might be an easy technique but you do need to experiment - making notes of your settings and your results. This is the only way to improve and develop your own style.

Light pollution can give you all sorts of problems - so a trip out into the countryside away from the orange street lights is recommended. If you live near the sea then point your camera out to sea it is usually darker that way!

Here's the technical stuff you need to consider. Try starting at ISO 400; focus you lens to infinity; set the lens to the widest aperture and point your camera to the sky. If you want to see the stars circling around a fixed point then you will need to point your camera to the North Star (easy to find - edge of the plough and 2.5 times above). However if you want to see how your favourite constellation moves across the sky then point your camera at that.

30 seconds of Sirius above the trees
Your experimenting will determine how long you set your exposure for. A recent 30 second exposure resulted in this tiny amount of movement from Sirius across the sky. You might need a cable release or a remote release if you decide to do exposures of minutes or hours.

The beauty of this technique is that you determine exactly what look you are after. Your abilities will improve with experimentation and you will develop your style and look.

This 10 second exposure taken in July at 11.30pm captures a satellite (top left)

If you think you'll wait until the summer and do your star gazing then when it's warm - then that is fine but be prepared for different problems. The image above was taken at 11.30pm and it's not really properly dark. I captured a satellite (top left) and the mist rolling in down the dale. It wasn't what I was after but it was a lovely capture none-the-less.

If you choose to capture shorter exposures you can stitch them together in photoshop (in a similar way to panoramas) try investigating Chris Schur's Star Trail Action. You will get the equivalent of a single long exposure.

The looks, idea and beautiful results are limitless.

Have fun capturing your stargazing masterpiece.

Next top tip - Print your Photos - next week.

. . . . . . . . . . . . . . . . . . . . . . . . . . . . . . . .


19 January 2012

Jill Cole

Very lucky to get to hear about work Jill has been creating during her time as artist in residence for the National Forest 'Photo~Canopy' project.

Had the chance to speak to her about my plans for my work to meet this brief. I want to explore the scars that remain in the National Forest local to me and to attempt to create a PhotoFilm of the guys that run the clayworks and landfill site within the Ashby Woulds. One day it will all be covered by a glorious country park at the very heart of the National Forest - but I want some record of it before it goes.

Jill described some of the issue she had whilst undertaking this work:

  • Access
  • The distance she lives from the National Forest
  • The weather
  • Finding the big idea
  • Her conflict concept (land use and change)
  • Processes
  • Is it about the trees?
  • How do you look at a Forest?
  • Your background will determine the way you approach the brief
  • Challenge to say something new about an area that it nearly 20. Is there an iconic image?
  • Avoid getting overwhelmed
  • Have focus

I made notes during her lecture:


Reflection:
Icing on the cake was to meet up with Jill the following day before she headed back home to North Yorkshire. We shared ideas, anecdotes and thoughts on coming to photography as a second career and the challenges that involves.

. . . . . . . . . . . . . . . . . . . . . . .

18 January 2012

Indignity

"She might hate me, and revile me,
and heap indignity after indignity upon me,
as she already had; but the pitiful fact remained that I loved her."

Edgar Rice Burroughs
author of Tarzan and other ape stories

. . . . . . . . . .

17 January 2012

Photo Tips #4

Top tips for you and your camera

# 4 - HOW TO AVOID CAMERA SHAKE

Just captured a lovely shot and been disappointed when you zoom in to see it's blurry? If you focused correctly on the subject and all other settings are correct - then it might be that you moved the camera whilst squeezing the shutter release. Here are some tips to avoid that happening in the future:
  • Use a tripod - the most common cause of camera shake is your movement. Shaky hands, breathing, moving, excitement - all these have ruined an otherwise perfect shot for me in the past. Get your camera onto a tripod then your shaky hands will not be the cause.
  • Shutter release cable - even on a tripod you might get some camera shake because your hand still needs to be on the camera to press the shutter. A cable to trigger the shutter is ideal, some cameras have a remote trigger. Check out what options are available for your camera.

  • Timer - if buying a cable seems like a silly thing to do then find out about the self-timer settings on your camera. Read through your manual to understand how to operate it, set your camera down somewhere safe and stable and let it do its thing for you.

  • Make yourself stable - if you don't have a tripod or the situation is inconvenient for a tripod then make yourself become the tripod. The easiest thing to do to make yourself more stable is to pull your arms into the side of your body. Squatting down and resting your elbow on your knee is also a stable position. If you are near a solid object lean against that to give you stability. All of these will help stop your body movement causing camera shake.

  • Make the camera stable - think about putting the camera onto solid objects - a wall if you are out in the landscape, a table if you are indoors, your camera kit bag if you want to get down low, think about using the ground (as long as it is not wet). Avoid using things that have suspension - so don't use the roof of a car or a seat of a motorbike.
Hopefully these tips will help reduce blur in your images caused by camera shake.

Next top tip - Shooting Star Trails - next week.

. . . . . . . . . . . . . . . . . . . . . . . . . . . . . . . . . . . . . . . .

16 January 2012

Mistakes

I learn by my mistakes - I am proud to say -
so I'm off out to make some more mistakes.

. . . . . . . . . . . . . . .

13 January 2012

Teeside Adventure

My Teeside adventure will include photographs but they wont be uploaded until Tuesday. You will have words only until then.

Have arrived in Saltburn on a clear and frosty night. The evidence, in this delightful and very comfortable guest house, is that there is a pier so that will be photographed tomorrow. For tonight I am going for a walk to the front to listen to the sea and perhaps set up camera for time lapse capture on the stars. I have been investigating buying an 'Intervalometer' if I'm going to do more time lapse projects, but for tonight I will be using the camera's self timer and my tripod to avoid any camera shake. I will find an off-license on the way back for a wee dram to warm me up.

Star to the left above the tree line - Sirius and on the right - Mirzam.

Time lapse on stars captured - most likely Sirius and Mirzam (left of Orion) moving across a line of trees. Realised as I left, after 20 mins of captures, that I was on private property and standing on someones roof! Whoops. Didn't stray too far as I couldn't really see what was where, I could hear the ocean and knew there was a cliff somewhere! Got a bottle of Merlot on the walk back past the end-of-the-line railway station. Saltburn is a lovely town. Looking forward to Roseberry Topping tomorrow.

Saturday:
The sun is coming up but I think I'll stay in bed. Here's the view out of my bedroom window over the roofs on the other side of the street.

Sunrise over roofs on Leven Street, Saltburn

Had an hour between breakfast and being picked up so I went to the beach and watched the surfers. Please bear in mind that there was frost and ice around. These surfers are made of hardy stuff. Was enchanted by the beach and the pier and the Huntcliff headland. Would love to come back here for a longer stay. Captured some lovely images. Landlady told me about the active and inspiring artist community that Saltburn has. Only slightly jealous.

Saltburn Pier

A rather arduous climb to the top of Roseberry Topping. Knees complaining but stunning views to compensate and much fun was had by all. The walk down was much easier and the lunch in the local pub was a welcome reward.
Jumping for joy at reaching the top

Party at New Marske Sports Club was tremendous fun and people really went to a lot of trouble dressing up, felt quite guilty not making any effort - but it wasn't compulsory. Live band were brilliant - The Fallen - they really got involved in the party and encouraged all those dressed as Slash or Kiss to air guitar along with them. Those of us that were single all had a bit of a crush! Big mention has to go to Lavendar Cakes who provided the most spectacular cake. Follow the link and see if you can find an image of Rebecca's cake - best up-to-date images of cakes can be seen by liking Lavendar Cakes on Facebook.

Sunday:
Into Whitby for about 10.30 and captured some images and sound that I will be using for a PhotoFilm. Also had a play with the tilt and shift lens. Got extremely cold - think it was somewhere around minus 3 overnight and reached a balmy 3 during the day! brrrrr

Tilt and Shift madness


Took about three and half hours to get home. Had to stop for a snooze at Woolley Edge services and slept for about ten mins whilst listening to Lord Peter Whimsy. Just what I needed to get me home safely.

I cant praise the B&B I stayed in enough. During the last twelve months I have stayed at two B&Bs that I would rate very highly. But with this one I am planning to go back - there is so much potential to photograph around Saltburn I cant let that slip by. (Plus .... Ssssshhhh I have been given a voucher - which makes it even more attractive).

. . . . . . . . . . . . . . . . . . . . . .


12 January 2012

Transitions and Tilley and Tea

What a great afternoon. I spent it entirely in the company of creative people. How my life has changed.

I am particularly grateful to Tilley at Red Door Studio who, whilst very kindly keeping me topped up with cups of tea, gave me a few hints and tips on After Effects. This is the software I am using to create my PhotoFilms. Thankfully Tilley loves After Effects and uses it for her animations and so was very excited to share her knowledge with me. I now know where to turn for any advice and guidance I will need getting to grips with these new skills as I develop my ideas.


After a quick lesson showing me how transitions and easy ease would improve my 'Clouds' PhotoFilm I have re-worked and remade it using cross fade transitions between the images - to soften the look and the finishing touch using easy ease to fade into the final frame. 

Well that was my intention - I am not entirely sure I have done it right but it looks how I imagined it would. Tilley is going to have a look in the morning and show me where I have gone wrong!

I truly love my life and the fact that I have found all these positively inspiring and creative people just about tops it all.

Happiness
. . . . . . . . . . . . . . . . . . . . . . .

10 January 2012

Blomenfeld and Sherlock

A Portrait Challenge


This image by Erwin Blumenfeld has always appealed. Perhaps it is the lack of depth of field, perhaps because only the hands are in focus, perhaps it all adds to the mystery. Whatever it is - I love it.

I was stopped dead in my tracks the other night as I watched Sherlock when this image popped up on my screen:


Only the hand in focus, shallow depJth of field, misty screen. All a bit mysterious.

I know this sounds unrelated but I have a floor protector which goes underneath my office chair and protects the carpet. Slowly, over the last year, the protector has disintegrated. I think this is because it was made of a brittle plastic – however what I am left with is an intriguing screen that I can shoot someone through.


Now I need the right person and the right conditions and I will attempt to capture something similar - my January challenge.


. . . . . . . . . . . . . . . . . . . . . . . .

09 January 2012

Photo Tips #3

Top tips for you and your camera
# 3 - COMPOSITION

Understand the 5 rules of composition and why they work will help you capture better images but more importantly you will learn how to break them and create your own style.

Simplicity
Many of the best images have very little in them. You are asking your viewer to focus their attention precisely where you want. This does not mean you have to remove all items from your shot you might be able to achieve it by changing the angle you are shooting from, reduce the depth of field so the background is blurred or get in really close to the subject to make sure it gets all the attention. Also think about putting that item off centre. (see rule of thirds)

Balance
Not only should you think about balancing the components of the image but also think about balancing the colours present in the shot. Images with primary colours in them will be more eye catching and dramatic. Remember red and orange are foreground colours (no matter where they are in your shot) so avoid red in the background if you can.

Rule of thirds
There are two lots of thirds in your image - ONE: the foreground, middle-ground and background - all need to appear in landscape shots and you can be clever about where you want your viewer to focus their attention. TWO: image your image with a O and X grid across it. Your images will instantly look better if you place the item you want attention on on one of the intersections of the lines.  

Lines
Lines appear in every shot you capture but you can use them to your advantage to lead your viewer to draw their attention to the focal point of the shot - they are called leading lines. They create tension and drama horizontal lines can split up the image in interesting ways, diagonal lines create visual paths, repetitive lines are interpreted by the eye as background and can be useful to bring the main subject into sharp relief.

Framing
Every time you put your camera to your face and look through the viewfinder you will be thinking about framing. You will decided which items you don't want in your shot and what you do - you are framing your shot and editing it. You can also use items in your shot to frame the scene you wish to capture - have a frame within your frame. This technique can produce powerful images.

Which of the rules does this image follow?

Now you have the rules you can go and have fun using them to improve your images or breaking them to create your own style.

Next top tip - 'how to avoid camera shake' - next week.

. . . . . . . . . . . . . . . . . . . . . . . . . . . . .


Which

"Which, of my photographs, is my favourite?
The one I'm going to capture tomorrow."

Imogen Cunningham

. . . . . . . . . . . . . . . . . . . . .

08 January 2012

It's an 'Appy' world

Finally got my iPad1 updated with iOS5. Thankfully I didn't lose any of my contacts or appointments - which had happened when my friedn updated - and I find I have access to more apps! As I have 69p burning a hole in my pocket I decided to purchase 'Word a Day' and 'Quote a Day'.


Be prepared to see my blogs filled with words I don't usually use and for there to be a rise in the number of quotes appearing. I do like my quotes as you are probably aware.

The update has given me a new way of making lists. I now have about 7 different ways to make a list. For me it is the making of the list that helps me with my work as I usually end up losing them.

. . . . . . . . . . . . . . . . . . . . . . . .

Another Deal

I looked in my inbox and saw an offer from Moo - I couldn't resist so have just created some mini card. This card will be attached to the CD pouch or memory stick by string or ribbon when I hand my work over to clients.


I think these will look mighty fine.
If you are about to get some new business cards then log onto Moo using this LINK and I'll get a small discount. Thank You.

Update: Tuesday ... ... Oooo they are on the way already - crikey that is quick. You've gotta love the Moo.


. . . . . . . . . . . . . . . . . .

Leg has been sorted

Took my product table leg to the engineer to show him the slight issue I had with it. He explained the mechanics of what had happened and corrected it and now it's all fixed I have paid him. This weekend I plan to set it all up and have another session experimenting with ideas I have. I have one piece of kit that I need to try out and once I have decided on that I will be ready.
At my networking meetings this week I mentioned that it, and I, were now (almost) ready to produce studio quality product shots in your home/office. A mobile product shoot studio quality table. Product shots mobile studio. Think all the words are there just not in the correct order. Now if I'm going to make this my USP I need the words sorting. All part of the re branding. The result of my annoucement at my meetings is that I have two bookings for product shots between now and March.
I have set myself some targets with the mobile studio:
  1. Set up product table/lights/camera and set up flashes as Master/Slave units - I know this sounds obvious but I need to be able to do these things quickly, so that they become second nature. This is all new kit and each piece has its quirks and difficulties. But I will need to be able to do this correctly even whilst someone is talking to me. Practice, and when you think you've got it practice again.
  2. Experiment with three lights to see how best to achieve the results I want with them - different objects require different treatments. Glass for example is best lit from below so all its beauty is visible, solid objects will be silhouettes if lit the same way.
I have all day to experiment and all the kit laid out before me.
 Images to follow


Reflection on my targets:
  1. A recent sports photography shoot saw me putting away and setting up the Bowens lighting kit five times in one three hour session. I can, hand on heart, now say I have no issues with setting up and sorting out the Bowens! See practice makes sense. Repetition repetition repetition.
  2. I want to be able to have in the back of my head, three different set-ups for the three different types of products that I will be presented with. That those set-ups will offer a solution for each and then give me the chance to add something else and create what my clients require.
. . . . . . . . . . . . . . . . . . . . . . . . . . . .

Ralph Waldo Emerson

"Nothing great was ever achieved without enthusiasm."

"Always do what you are afraid to do."

I try to approach most things with these viewpoints.


"Life is a journey, not a destination."

This is another of RWE's quotes. After much discussion with a very well travelled lover I encouraged him to see the destination as much a place to be as his well travelled life. However, he continues to journey.

UPDATE:
How cool is this - the well travelled lover was in touch recently and it seems he has reached his destination. His long journey is over. He is happy and well with his delightful and beautiful wife in Australia. Arrrrhhhhh a happy ending - bliss.

. . . . . . . . . . . . . . . . . . . .

Elephant Man

Actors: John Hurt, Anthony Hopkins, Hanna Gordon, John Gielgud, Anne Bancroft, Michael Elphick.
Director: David Lynch


First time I've seen this film. Tremendous. Of course I know the story, but I had never watched the whole film.

What surprised me was that it was filmed in the early 1980s - it has a much older feel to it. I find that most 'historic' films say something about the time they are filmed. Either by a reference to a current issue, or a hairstyle, a fashion - something. This film did not do that. A very pleasant change.

Set in Victorian London around 1880s David Lynch was lucky to find that London docklands still looked pretty much the same as it had a century earlier. It seems it was perfectly timed as most of the locations were cleared for the dockland regeneration shortly after filming was complete.

Glad I didn't see it back in 80s, pleased to have waited. Back in the 80s it would have frightened me, I was a bit of a scaredy-cat back then.


Reflection:
After watching the extras on the DVD, and hearing the interview John Hurt gave, it struck me there are similarities between this and Jaws (which I watched over the Christmas break). John was discussing with the make-up, artist about how he should look as John Merrick, and saying "take your time, take your time - don't get me ready too soon." He didn't think the viewer should see what John Merrick looks like until much later in the film. This was the same for the reveal on the shark in Jaws. It is not until you are a long way into the film do you see the shark. The suspense gives the film more power. Partly this was due to the shark not working correctly once it was put into salt water. But even though this was a technical issue it meant the film was shot around not seeing the threat and, like the Elephant Man, the build up to the reveal and the suspense that builds up in the viewer are what makes these films work and has made them the tremendous successes that they are.

. . . . . . . . . . . . . . . . . . . . . . . . .


06 January 2012

Business

After a busy week giving presentations, networking, catching up with people after the Christmas break and only having 2 hours sleep last night (no idea why - so I just carried on working) - I have now set up 7 job bags of work to do between now and beginning of March.

Seven job bags - Nice

This is tremendous and it confirms to me that I made all the correct choices back in 2008. As my degree course draws to a close I will have lots of work to achieve for that - but my clients will come first. The degree has opened doors, given me confidence and equipped me with techniques and skills to deliver excellent quality service for my clients.

I plan to re brand my company with the help of the gifted, and very talented, Redroo Creatives during the spring and I will relaunch the new look business with their help as I graduate in June.

In the meantime I am getting out there meeting client briefs and exceeding them, continuing networking, developing my offer, developing my skills and marketing my company.

One last thing ...
I am in the market for a Business Mentor. I see it as a back scratching exchange so if you know anyone that needs some updated photography (personal or business) then I'll be happy to chat to them to see if we can help each other.

. . . . . . . . . . . . . . . . . . . . . . . . . . . . . . . . .

05 January 2012

First Networking meeting of the year

WIBN
Brilliant WIBN meeting today - really don't like being in the Conservatory at Dovecliffe Hall because people cant see the images on my iPad, but lots of fun none-the-less. Received lots of leads along with exciting ideas for future collaborations and work.

Sheelagh did an amazing job at keeping us all in line, but I did miss Rebecca. Memories of the Christmas do from Debbie who I made horses for out of the mint wrappers.

Travelled home via the framers as I have a few images I have printed off that need framing and then selling.


. . . . . . . . . . . . . . . . . . . . . . . . . . . .

04 January 2012

Windows

Opened my blind this morning, looked out my window and look what greeted me:

Sunrise, Moira

Just another gorgeous sunrise image - but what it signifies to me is that I now have the time to stop and see things like this and to capture them to share with others. You have no idea how much this means to me, I have been striving for this for the last decade and more seriously for the last 4 years. Finally it is all coming together.

. . . . . . . . . . . . . . . . . . . . . .

ideas.events.people

"Great minds discuss ideas.
Average minds discuss events.
Small minds discuss people."

Eleanor Roosevelt

Are you an ideas, events or people person?

. . . . . . . . . . . . . . . . . . . . . . . . . . .

In preparation

In preparation for the coming year we should always remember:

"Culture is to Britian as sun is to Spain.
We are much better at culture
than we are at sport."

Andrew Graham-Dixon

03 January 2012

AE - First Attempt

PhotoFilm

This wont look like much and it did take me 3.5 hours to create this movie but I have, finally, mastered the technique to make my first 20 second 'PhotoFilm'. Was given some top tips today on how to make After Effects do what I wanted. I have put them all into action and made my first PhotoFilm this evening.

I have many projects I want to do that involve using this technique so I will continue practising and learning more about the software.

Here's a screen grab of the beast when I was just about to render it:

This actually looks incredibly neat - it was much more chaotic then it looks!

I need to learn how to get it onto my Vimeo account so that I can create a link so you will be able to watch them as I create them - but for now I am off to sleep and give my eyes a rest. Great sense of achievement from doing this.

. . . . . . . . . . . . . . . . . . . . . . . . . . . . . . . . .

02 January 2012

Photo Tips #2

Top tips for you and your camera
# 2 - IMPROVE YOUR IMAGES

We all need a bit of inspiration at times. I often ask my photography buddies to set me a challenge - that way I keep stretching my ideas and step outside of my comfort zone. Here are some to get you going: 

  • Read your camera manual and try out one of the special features. Each camera has its own special talents and you need to find what yours is. Sometimes you might need inspiration on using this feature - to do this you can buy a book covering the topic, find a lesson online, or book me for an hour to go through it with you.
  • Get online and take a look at what other photographers are doing - this might spark your ideas, interest or enthusiasm. There are many sites that can help you with this: Flickr, deviantART, Zoomr, Fotki, Shutterfly, SmugMug, PhotoBucket and photo.net. Also there are forums where you can discuss issues and ideas and they sometimes set challenges - I quite like Talk Photography.
  • The key to improving your images is getting to know your camera. Get to know what it does best and what is struggles with. The only way to do that is to carry it with you all the time and practice, play and enjoy. Set some time aside to download and review your images. Keep them all - take the good along with the bad because all the images you take help you get to a point of improving your techniques and capturing better images.
  • Share your passion - organise to go out with fellow photographers on adventures. Day trips out will give you all the chance to look at the same thing in different ways. Then review all your images and compare and contrast. Learn from your friends on how and why they did what they did. I have a group I travel to Churches and Cathedrals with - we love the iconography and the peace and quiet and also this cannot be spoilt by the weather. We have learnt so much from each other.
Chester Cathedral Stained Glass Window

Hope this has given you some ideas.


Next top tip - 'composition' - next week.

. . . . . . . . . . . . . . . . . . . . . . . . . . . . . . . .

For Uncle Pete


To cheer up your kettle.

. . . . . . . . . . . . . . . . . . . . . . . .

Extruded Light Drawings - horse

I found a horse on my bed. Not in a Mafioso style but after investigating how my light extruding app works.


I have discovered that I can do things with graphics and images. Oh now a whole new world of weird loveliness has opened up to me.

. . . . . . . . . . . . . . . . . . . . . . . . . . . . . . . . . .

What is photography?

"When photography first emerged into the nineteenth Century aesthetic, it was taken to be an automatic record of reality; then it was contested that it was the expression of an individual; then it was considered to be a 'record of a reality refracted through a sensibility.'"

Victor Burgin

Any clearer?

. . . . . . . . . . . . . . . . . . . . . . . . . . . . .

01 January 2012

Extruded light drawings - Colin

Experimented on Colin.

Decided I needed to have another go at the light drawings.
Had a willing assistant this evening so I gave it another try.


The camera needs to be on a tripod, subject needs a little more light but I think I'm getting the hang of this. I can see ways of making use of this. Will experiment and develop it more and see where it takes me.

Such fun.

. . . . . . . . . . . . . . . . . . . . . . . . . . . . .